How to set up the access point for JAPAEMO SIM (Android)
| Setup information | |
|---|---|
| Access point name(APN) | umobile.jp |
| Authentication ID(ユーザー名) | umobile@umobile.jp |
| Password | umobile |
| Authentication method | CHAP or PAP |
How to setup Android devices
For devices using Android 4.0 or later, please refer to the procedure below.
Depending on the device, procedure and terms may differ.
- Insert SIM-card into device
- Tap “Apps”
- Tap “Settings”
- Tap “More”
- Tap “Mobile network”
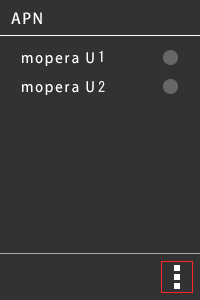
- Tap “APN”
- Tap “Menu”
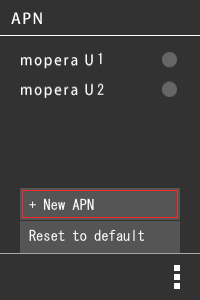
- Tap “New APN”
- After entering the the above information, tap [Menu] icon→[Save]
- Go back to the [APN] screen and tap the newly setup access point
1. Inserting a SIM-card into an Android device
Please refer to the device’s manual regarding how to insert the SIM-card.
2. Tap the [Apps] icon on the home screen.

3. Tap the [Settings] button
- If [Settings] is not displayed in [Apps]: while accessing the home screen, press the device’s menu button and tap [Settings]
- Depending on the device, both [本体 settings] and [System settings] may be displayed

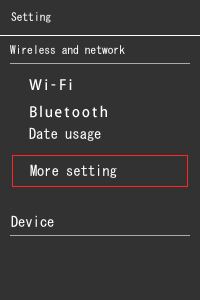
4. Tap [More] under [Wireless and network]
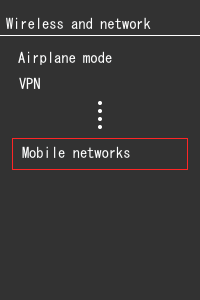
5. Tap [Mobile network]
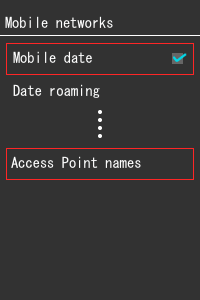
6. Check [Enable data] and tap [Access point names]
Depending on the device, [Access point name] may be shown as [APN]
7. Tap the [Menu] icon
Depending on the device, icon location and design may differ.
8. Tap [New APN]
9. After entering the the above information, tap [Menu] icon→[Save]
It is only necessary to change the below articles
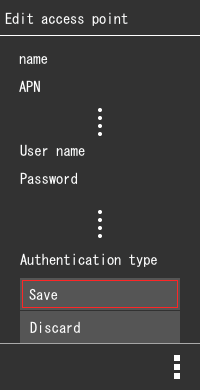
- Name
- Access point name
- Authentication ID
- Password
- Authentication method
- If the [Menu] icon is not display on the screen, press the device’s menu button and tap [Save].
- If [Save} is not displayed on the screen, press the device’s [Back] button.
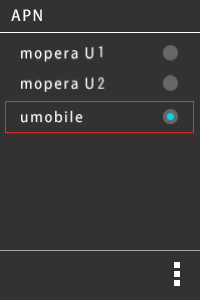
10. Go back to the [APN] screen and tap the newly setup access point
The setup is complete.
Open a browser and confirm that you can access the internet.